
Imagine sinking your teeth into a crispy, juicy chicken nugget, knowing it’s made fresh in your own kitchen. Homemade chicken nuggets offer a healthier and tastier alternative to store-bought options, allowing you to control the ingredients and the cooking process. Whether you’re cooking for yourself or your family, making nuggets from scratch can be a fun and rewarding experience.
Thank you for reading this post, don't forget to subscribe!Using ground chicken is a game-changer for achieving that perfect nugget texture. It’s tender, juicy, and can be seasoned to your liking. Plus, you can choose from various cooking methods—bake them in the oven, crisp them in an air fryer, or pan-fry them for that golden crunch. The best part? You can customize the recipe with your favorite spices or even add some hidden veggies for extra nutrition.
Making homemade chicken nuggets is not only cost-effective but also ensures you’re serving a meal free from preservatives. With just a few simple ingredients, you can create a batch of nuggets that are both delicious and better for you. So, let’s dive into how you can make these tasty treats at home.
Key Takeaways
- Ground chicken provides a tender and juicy texture similar to store-bought nuggets.
- Customizable recipe allows for added spices or vegetables.
- Cooking options include oven baking, air frying, or skillet cooking.
- Homemade nuggets are healthier and more cost-effective than store-bought alternatives.
- Preparation is quick, with a total time of about 25 minutes.
Introduction: Why Make Your Own Chicken Nuggets?
Creating your own chicken nuggets at home offers a world of benefits. Not only does it allow you to control the ingredients, but it also ensures a fresher and healthier meal for you and your family. The process is simple and can be adapted to suit various tastes and dietary preferences.
Benefits of Homemade Cooking
One of the main advantages of homemade cooking is the ability to customize your dish. You can choose the quality of the ingredients, reducing the amount of salt and preservatives that are often found in store-bought options. Additionally, homemade nuggets can be more cost-effective and fun to make, involving the whole family in the process.
Why Choose Ground Chicken?
Ground chicken is an excellent choice for making nuggets because it provides a tender and juicy texture. It can be seasoned to your liking and shaped easily into nuggets. The even texture ensures that the nuggets cook uniformly, whether you choose to bake them in the oven, crisp them in an air fryer, or pan-fry them for a golden crunch.
Overall, making your own nuggets at home offers a perfect balance of taste, health, and convenience. It’s a great way to enjoy a delicious meal while having control over the ingredients and cooking methods.
Ingredients Breakdown and Selection
Selecting the right ingredients is crucial for creating delicious and juicy nuggets. The quality of each component directly impacts the final result, ensuring your nuggets are flavorful and tender.
Key Ingredients for a Juicy Nugget
Start with fresh, high-quality ground chicken as your base. This ensures a tender texture and even cooking. Next, prepare a panade—a mixture of milk-soaked breadcrumbs. This step is essential for keeping the nuggets moist. Add a pinch of garlic salt and your preferred spices to enhance the flavor without overpowering the dish.
Optional Add-Ins for Enhanced Flavor
Consider adding some optional ingredients to give your nuggets a personal touch. A sprinkle of Parmesan cheese can add a nice tang, while finely shredded vegetables like carrots or zucchini can boost nutrition and flavor. For a crunchier exterior, try mixing in some crushed cornflakes. Remember, the key is balance—don’t overload the mixture, as it can make the nuggets dense.

Measuring each ingredient accurately ensures the best results. Stick to the tested recipe to maintain the perfect balance of flavors and textures. This attention to detail will make your homemade nuggets a hit with everyone who tries them!
Tools and Equipment You’ll Need
Having the right tools in your kitchen can make a big difference when preparing homemade nuggets. Let’s break down the essential equipment you’ll need to ensure success.
A food processor is a valuable tool for grinding meat or mixing ingredients smoothly. It helps create a consistent texture, which is crucial for even cooking. If you don’t have a food processor, a good knife and cutting board can work, but it will take more time.
Next, you’ll need some basic kitchen tools like mixing bowls, a spoon or spatula, and parchment paper-lined baking sheets. These are must-haves for mixing and shaping your nuggets. For cooking, you can choose between an oven, air fryer, or skillet, depending on your preference for crispy or baked nuggets.
| Tool | Purpose |
|---|---|
| Food Processor | Grinding meat or mixing ingredients |
| Mixing Bowls | Combining and seasoning the mixture |
| Parchment Paper-Lined Baking Sheets | Shaping and freezing nuggets |
| Oven/Air Fryer/Skillet | Cooking the nuggets |
Optional but helpful tools include an air fryer for a crispy finish and silicone liners for easy cleanup. A proper freezer setup is also handy if you plan to batch freeze your nuggets for later meals.
By having these tools ready, you’ll streamline the process and ensure your homemade nuggets turn out perfectly every time.
Preparing the Panade and Meat Mixture
Creating a panade is the first step in ensuring your nuggets stay moist and flavorful. This simple mixture of milk-soaked bread and spices is essential for locking in moisture during cooking.
Crafting the Perfect Panade
To make the panade, soak fresh bread in milk along with your preferred spices, such as garlic salt. Let it sit until the bread is soft and the mixture is smooth. This step is crucial for preventing the ground chicken from becoming dense.
Combining Ingredients for Ideal Texture
Gently mix the panade with the ground chicken. Be careful not to overmix, as this can make the nuggets tough. Whether using freshly ground or store-bought chicken, the panade ensures even distribution of flavors and moisture.
Handling the mixture gently will maintain a light and tender texture. For those using chicken breast, a little extra care ensures the nuggets remain juicy. This method works well whether you’re using an air fryer, oven, or skillet for cooking.
Shaping and Breading the Nuggets
Now that your mixture is ready, it’s time to shape and bread the nuggets for that perfect texture and crunch. This step is crucial for achieving uniform cooking and a delicious presentation.
Forming Perfect Nugget Shapes
Take small portions of the mixture and gently shape them into nugget forms. Aim for a thickness of about 1/2 to 3/4 inch to ensure even cooking. You can also use cookie cutters for fun shapes, making it a great activity for kids. Remember, consistent sizing helps the nuggets cook uniformly in the oven or air fryer.
Achieving a Crispy Breading
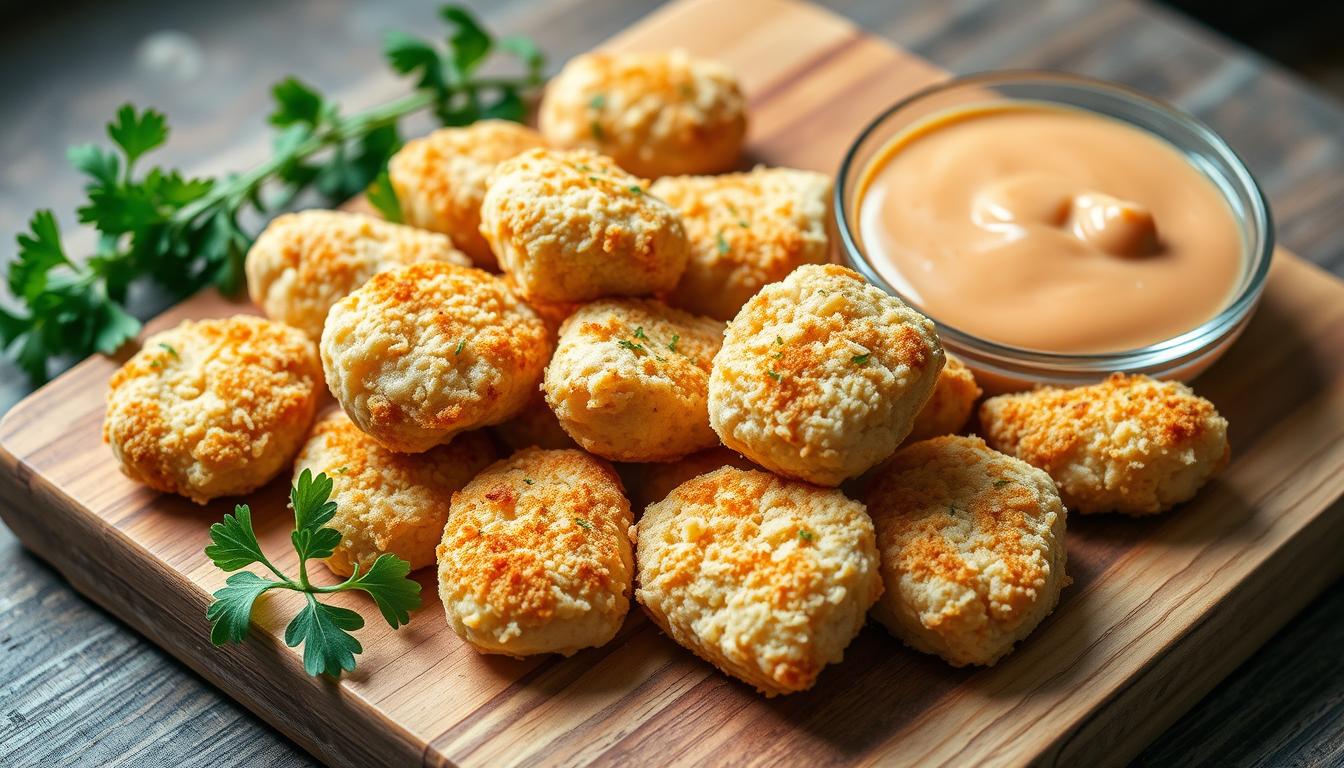
Dip each nugget in a beaten egg and then coat it evenly with a mixture of Panko breadcrumbs, grated Parmesan cheese, and a pinch of parsley. For extra crispiness, you can chill the breaded nuggets in the fridge for 30 minutes before cooking. When baking in the oven at 375 degrees Fahrenheit, brush the nuggets with melted butter halfway through the 15-minute cooking time to achieve a golden, crispy exterior.
By following these steps, you’ll create nuggets that are not only visually appealing but also packed with flavor. The right shaping and breading techniques ensure a satisfying crunch on the outside and a tender interior.
Cooking Methods Overview
Cooking your homemade nuggets is where the magic happens. Whether you prefer a crispy exterior or a tender interior, the right cooking method makes all the difference. Let’s explore three popular methods to cook your nuggets to perfection.
Oven Baked Method Basics
Oven baking is a great way to achieve a golden, crispy exterior without extra oil. Preheat your oven to 400°F (200°C). Place the nuggets on a parchment-lined baking sheet, leaving space between each for even cooking. Lightly spray with avocado oil for crispiness. Bake for 18-22 minutes, flipping halfway through. This method ensures a consistent result with minimal effort.
Air Fryer and Skillet Options
The air fryer offers a quick and healthy alternative. Preheat it to 375°F (190°C), spray the basket with cooking spray, and cook the nuggets in a single layer for 10-12 minutes, shaking halfway. For skillet cooking, heat a non-stick pan over medium heat with a little oil. Cook the nuggets for 5-7 minutes per side until golden brown and cooked through.
| Method | Temperature | Time |
|---|---|---|
| Oven | 400°F (200°C) | 18-22 minutes |
| Air Fryer | 375°F (190°C) | 10-12 minutes |
| Skilliet | Medium Heat | 10-14 minutes |
Each method ensures your nuggets are cooked to the perfect consistency and flavor. Choose the one that suits your taste preferences for the best results.

Homemade Chicken Nuggets with Ground Chicken
Crafting the perfect homemade nuggets involves more than just mixing ingredients; it’s about technique and attention to detail. Achieving consistency in size and texture ensures that every nugget cooks evenly, whether you choose to bake, air fry, or pan-fry them.
Approach for Perfect Nugget Consistency
The key to uniform nuggets starts with your meat mixture. Gently combine the ground chicken with your panade and seasonings. Avoid overmixing, as this can make the nuggets dense. When shaping, aim for nuggets that are about 1/2 to 3/4 inch thick. This ensures they bake evenly in the oven or crisp up nicely in the air fryer.
Step-by-Step Nugget Assembly Tips
Once your mixture is ready, it’s time to shape and coat. Use a cookie scoop or your hands to form uniform portions. Dip each nugget in a beaten egg and then coat evenly with breadcrumbs mixed with a pinch of paprika. For extra crispiness, chill the coated nuggets in the fridge for 30 minutes before baking or air frying. If you want to store them for later, place the nuggets in a sealed bag and freeze for up to 2 months. When you’re ready, bake them straight from the freezer at 400°F for about 25 minutes, flipping halfway through. This method ensures they retain their crunch and flavor.
Step-by-Step Cooking Instructions
Now that your nuggets are shaped and breaded, it’s time to cook them to perfection. Whether you prefer the oven, air fryer, or skillet, follow these precise steps for the best results.
Temperature and Timing Guidelines
Preheat your oven to 400°F (200°C) for a crispy finish. Place the nuggets on a parchment-lined baking sheet, leaving enough space between each for even cooking. Lightly spray with avocado oil for crispiness. Bake for 18-22 minutes, flipping halfway through.
For an air fryer, preheat to 375°F (190°C). Cook in a single layer for 10-12 minutes, shaking halfway. In a skillet, heat a non-stick pan over medium heat with a little oil. Cook for 5-7 minutes per side until golden brown and cooked through.
| Method | Temperature | Time |
|---|---|---|
| Oven | 400°F (200°C) | 18-22 minutes |
| Air Fryer | 375°F (190°C) | 10-12 minutes |
| Skilliet | Medium Heat | 10-14 minutes |
Use a cup to measure oil and a teaspoon for spices. With your hands, gently press the nuggets for even cooking. After cooking, let them rest for a few minutes before serving. This ensures they stay juicy and flavorful.

Customizations and Flavor Variations
Make your nuggets truly unique by experimenting with creative ingredients and seasonings. This is where you can let your culinary creativity shine and tailor the recipe to your taste preferences.
Incorporating Vegetables and Cheese
Add some finely grated vegetables like cauliflower or carrots to boost nutrition without altering the texture. For an extra burst of flavor, mix in some shredded cheese or Parmesan into the mixture. This not only enhances the protein content but also adds a creamy layer to the coating.
Spice It Up: Adding Heat and Herbs
Elevate the flavor profile by incorporating herbs like Italian seasoning or a pinch of cayenne pepper for a spicy kick. These additions can transform your nuggets into a gourmet snack or meal.
| Customization | Ingredients | Benefits |
|---|---|---|
| Veggie Boost | Cauliflower, Carrots | Added Nutrition |
| Cheesy Flavor | Shredded Cheese | Extra Protein |
| Spicy Kick | Cayenne Pepper | Enhanced Flavor |
“The joy of cooking is the joy of creating, and the best dishes are those that reflect your personal touch.”
By experimenting with these customizations, you can maintain a crispy exterior while keeping the interior juicy and flavorful. Whether you’re mixing ingredients in a large bowl or trying out new nugget shapes, the possibilities are endless. This approach ensures your nuggets stay exciting and nutritious, perfect for any meal.
Storage, Reheating, and Freezing Tips
Proper storage and reheating are key to enjoying your homemade nuggets fresh and crispy. Whether you’re refrigerating leftovers or freezing for future meals, the right techniques ensure your nuggets stay flavorful and juicy.
Best Practices for Freshness
Cool your nuggets completely on a wire rack before storing to prevent moisture buildup. Use airtight containers or freezer bags for refrigeration (up to 3 days) or freezing (up to 3 months). Label containers with dates for easy tracking.
Maintaining Crispiness When Reheating
To restore crispiness, reheat in the oven at 375°F for 8-10 minutes or in the air fryer at 350°F for 4-6 minutes. Pat dry with paper towels before reheating to remove excess moisture. This ensures a crunchy exterior and tender interior.
“The secret to perfect reheating is gentle heat and proper drying to maintain texture.”
- Refrigerate within 2 hours of cooking.
- Freeze nuggets separately on parchment-lined trays before transferring to bags.
- Pair with sides like potato wedges for a complete meal.
By following these tips, your homemade nuggets will stay fresh and delicious, ready to be enjoyed anytime.
Conclusion
With these simple steps, you can create healthy chicken nuggets that are both delicious and easy to make. Using a food processor ensures your mixture is smooth and even, while breadcrumbs add the perfect crunch. Customize your nuggets with spices or veggies for extra flavor and nutrition.
Remember, making homemade nuggets is cost-effective and gives you full control over ingredients. Whether you bake, air fry, or pan-fry, the result is a tasty meal that’s better for you. Try batch prepping to save time on busy days and enjoy your healthy chicken nuggets whenever you want.
Share your creations and enjoy the satisfaction of a meal made with love and care. Happy cooking!